Recently the battery in my aging laptop (Sony Vaio VGN-NR498E) took a nose dive. This is to be expected after 4 years or so, so I was not too upset about it. What I am upset about, is the fact that Sony doesn’t seem to sell a genuine replacement for the battery. The original is a VGP-BPS9/B and the only “Sony” batteries I found online were from disreputable sources and cost around $150. I decided to take the battery apart and see if I could replace the cells directly, but in the process I had to break most of the battery connections and it did not seem trivial to replace them. After whining about it for a week I opted to buy a third party battery off Buy.com for $59.
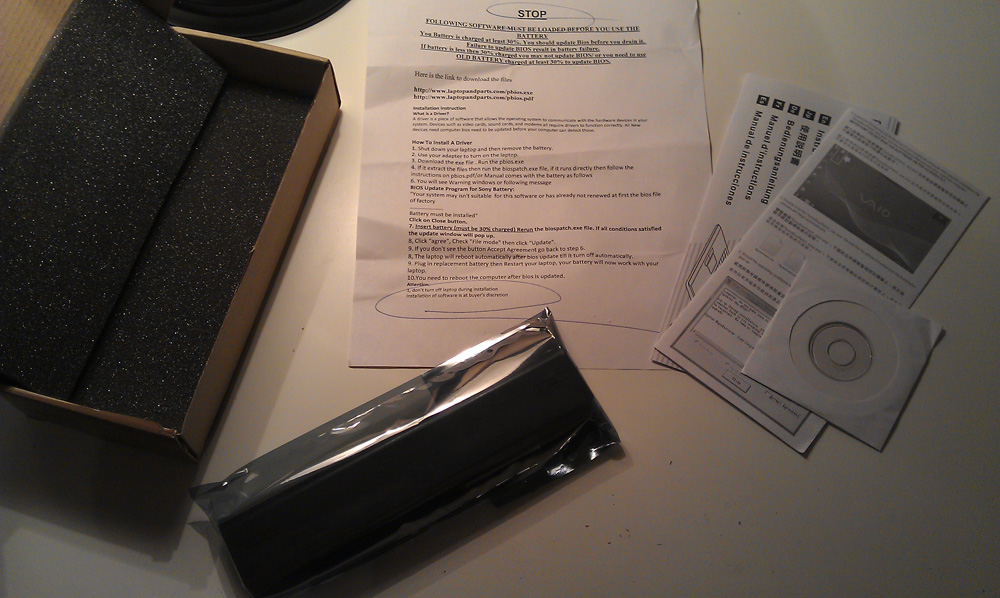
Battery Shipment Contents
I received the shipment within 5 days and inside I found the battery, a couple pages of instructions and a mini CD. There was also a written warning in poorly translated English stating that I needed to update the BIOS in order to use the battery. It was so poorly translated that I couldn’t even get a loose interpretation of some of the text. For example, “You’re system may isn’t suitable for this software or has already not renewed at first the bios file of factory” (side note: is it really that hard to get a fluent English-speaker to proof read your instructions?). Anyway, the instructions suggested that I may damage the battery and/or system if I didn’t update my BIOS before plugging in the battery, so I popped in the CD which presumably contained the update. The CD was blank. I ended up finding the necessary software on a site mentioned in their instructions, but the software gave me a vague warning that my BIOS was not supported and even after I forced the update the software crashed. At this point I gave up on bricking my laptop via a failed BIOS update and opted to plug it in and hope for the best. The battery showed about a 40% charge but the laptop said it was not charging it (I don’t haveSony’s anti third-party battery software installed). After much frustration and trying different combinations of removing and replacing the battery at different times, I decided to take the Steve approach and hack it :).
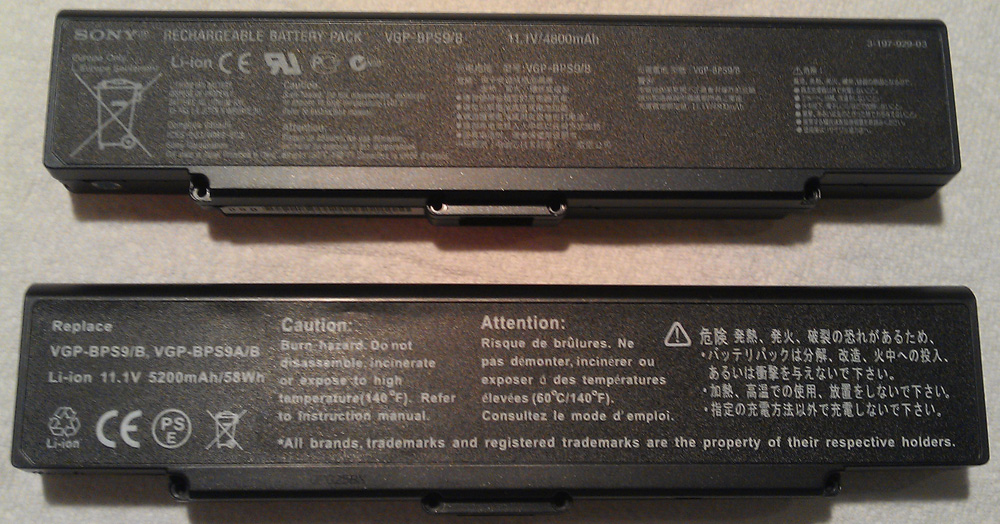
Original Sony battery (top) and replacement (bottom)
I had already taken my original battery apart and thrown the dead cells away, so I don’t have any pictures of it, but it looked almost exactly the same as the replacement: 6x 3.6V battery cells and a controller card. Batteries are nothing but a means of storing power, so the controller must be responsible for communicating things like battery capacity and charging status. I decided to transplant the new battery cells onto the old Sony controller and give it a shot; in short, it worked! Here’s the process in pictures.
Step 1: Take batteries apart - remove 4 screws and pry top cover off, then gently pry out the batteries and controller card.
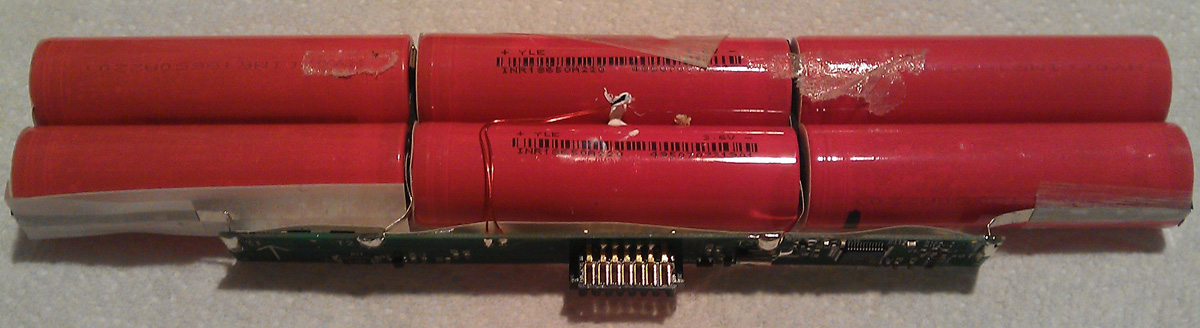
Replacement Battery
Step 2: Remove the controller card from the batteries by desoldering the four metal tabs that connect to the different battery junctions. I used desoldering wick, flux and a hot soldering iron.
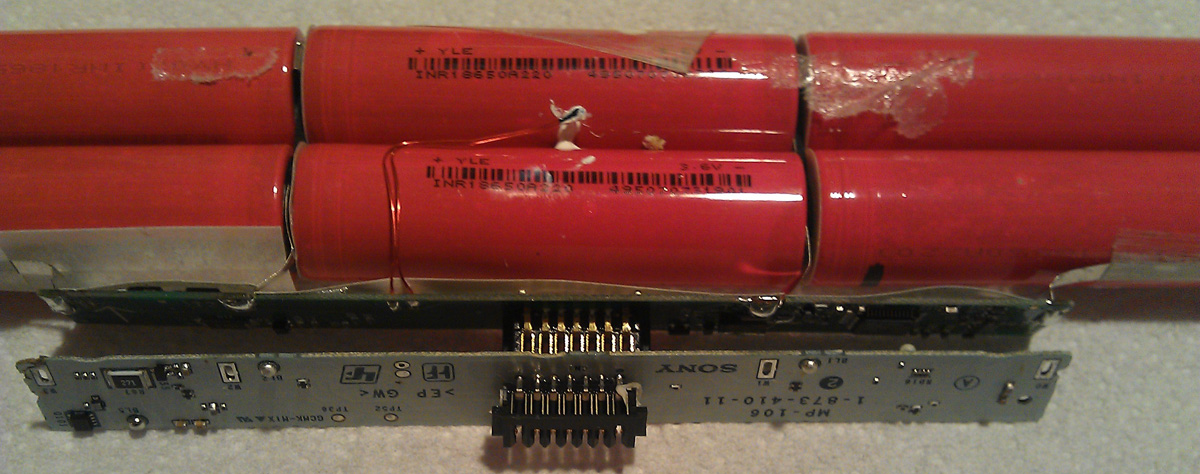
A closeup of the new controller (attached), and the original Sony controller next to it.
Step 3: Solder the battery leads to the new controller.
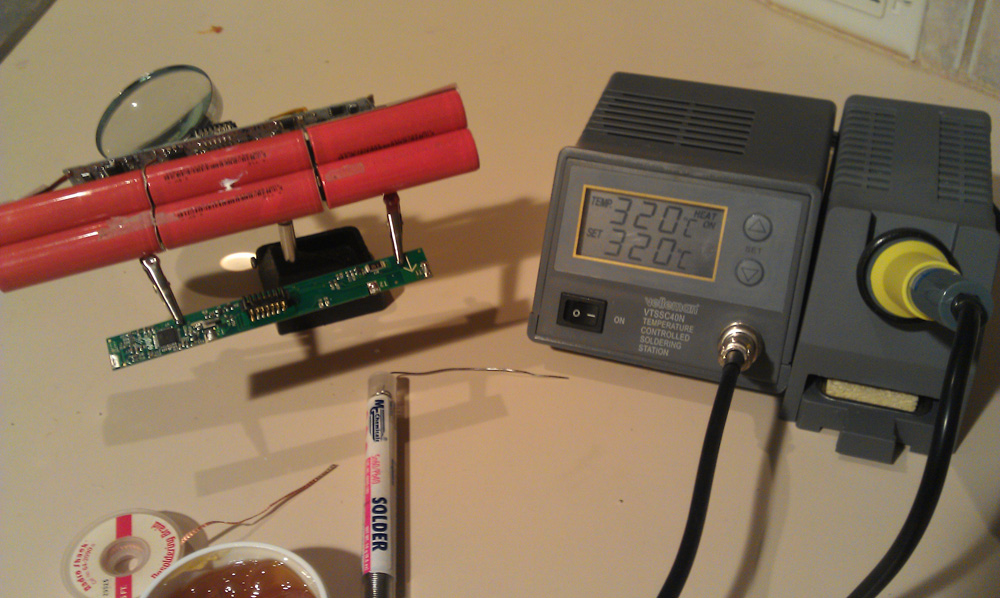
Solder Sony Controller

Finished Controller
Step 4: Reassemble the battery and secure it with some hot glue.

Glue the Batteries and Controller
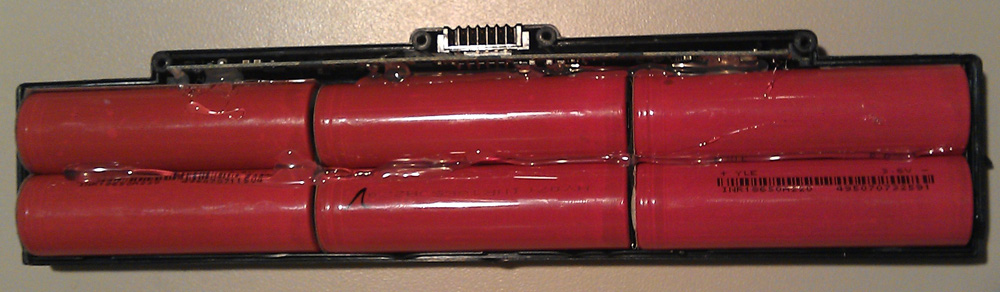
Finished Battery
Step 5: Once the top cover is replaced, put the battery back in the computer - you’re done! For best results you will also need to recalibrate the battery by letting it charge completely, then unplugging the power cable and let the battery discharge until it’s completely dead. I let my new battery charge overnight, then discharged it in the morning. Incredibly, the new battery kept the laptop alive for over 3 hours - a significant improvement over the 5-10 minutes I was getting before!
If you are going to attempt this, you should know that there is a very real possibility that things could go horribly wrong if, for example, you wired the battery pack in backwards. You could destroy the charging circuit in your laptop or even melt it down into a heap of plastic and potentially burn down your house in the process. That having been said, if you know what you’re doing, this is a great way to recover an investment in a low-grade battery!